Collector guide
Sports Card Grading Checklist: 9 Steps Before You Submit
A step-by-step sports card grading checklist covering centering tolerances, corners, edges, surface, autos, relics, and when grading isn't worth the fee.
By Matteo G.
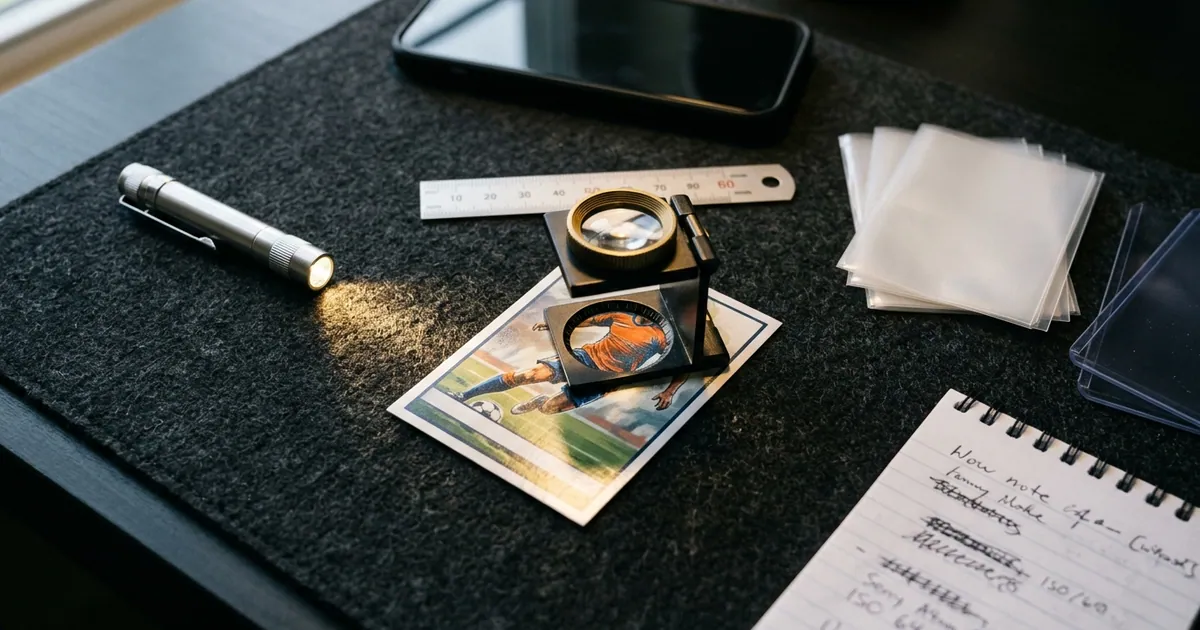
A sports card grading checklist is a fixed sequence of inspections you run before paying to grade a card: identity, size, centering, corners, edges, surface, and the sport-specific stuff like autographs, relics, and chrome finishes. Run it properly and in about five minutes you’ll know whether a card has a realistic shot at a 9 or 10, and whether the fee is worth paying at all. Below is the exact checklist I’d hand a friend, with the published tolerances to measure against.
Key takeaways
- Inspect in a fixed order and stop early: if centering or a corner already caps the card at an 8, you don’t need to hunt for surface scratches to make a decision.
- Grades are driven by the weakest attribute. One soft corner outweighs three perfect ones.
- Use two kinds of light: bright, daylight-balanced light for color and centering, and low-angle raking light for dents, scratches, and print lines.
- Sports cards need checks that generic checklists skip: autograph certification, relic thickness, chrome surface defects, and vintage sizing and trimming.
- If the realistic graded value doesn’t clear the all-in cost (fees, shipping both ways, insurance, selling fees) with room to spare, keep the card raw.
What you need before you start
You don’t need a lab. You need:
- A 10x jeweler’s loupe (or a decent phone macro lens) for corners and edges.
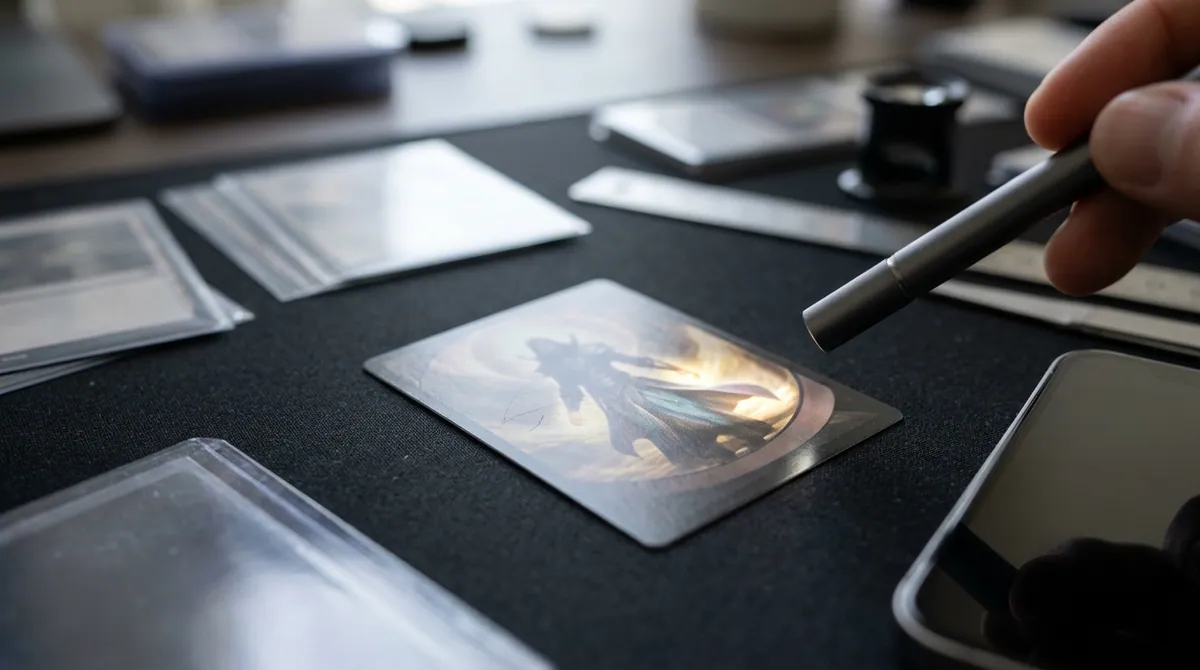
- A small LED penlight for raking light. It beats a phone flashlight because you can control the angle precisely.
- A daylight-balanced lamp, roughly 5000K to 6500K, for color and centering. Warm yellow bulbs hide wax stains, toning, and print defects.
- A ruler with millimeter marks or a centering tool, plus a known-good card from the same set for size comparison.
- Clean, dry hands or nitrile gloves, a microfiber cloth, and a dark, soft work surface so whitening and chipping stand out.
- A notepad or spreadsheet to record the worst issue in each category.
Raking light means holding the penlight nearly parallel to the card, about 10 to 20 degrees off the surface, and slowly rotating the card. Dents, roller marks, and hairline scratches that vanish under overhead light suddenly cast shadows or flash bright.
The step-by-step sports card grading checklist
Work through these in order with the card in hand. Take it out of the sleeve for inspection, and put it into a fresh penny sleeve the moment you’re done.
Step 1: Confirm exactly what the card is
Before condition, confirm identity: year, manufacturer, set, card number, player, and parallel. On modern cards, check the parallel color under daylight. Refractor and color parallels get misidentified constantly, and it affects both value and what ends up on the label. If the card is serial-numbered, read the stamp under the loupe and make sure it’s clean. On vintage, rule out reprints by comparing card stock, print sharpness, and the back against a verified copy.
Step 2: Check the size and look for trimming
Most modern sports cards are 2.5 x 3.5 inches. Older issues vary (many 1950s Topps cards, for example, are 2-5/8 x 3-3/4 inches), so compare against a known-good card from the same set rather than a generic standard. Stack the two cards and check all four edges. Red flags: a card that’s slightly short in either dimension, edges that are unnaturally smooth or razor-straight on a vintage card, or suspiciously sharp corners on an otherwise worn card. Major graders won’t give a trimmed card a numeric grade; PSA, for example, labels detected alterations as authentic-altered rather than assigning a number. If you suspect a trim on a card you just bought, deal with the seller rather than paying a grading fee to confirm it.
Step 3: Measure centering, front and back
Centering is the cheapest disqualifier, so do it before the slow work. Measure left vs. right and top vs. bottom borders, then convert to a ratio: a 3mm left border and a 2mm right border is 3 / (3 + 2) = 60/40. Repeat on the back, and note any tilt, since a card cut on a slight diamond reads as off-center even if the borders average out. Compare your numbers to the standards in the next section. For a full walkthrough, see our card centering guide and tool.
Step 4: Inspect all four corners under magnification
Under the loupe, each corner should come to a sharp point with no fraying, rounding, layering, or bends. On dark or colored borders, look for tiny white dots at the tip; that’s the first sign of wear and it’s enough to cost a 10. Check every corner on both front and back, because damage often shows more on one side.
Step 5: Inspect the edges
Lay the card on the dark surface and look straight down at each edge, then tilt it to see the edge itself. You’re looking for whitening, chipping (especially on dark borders and chrome stock), dings, and rough or flaky cuts. Factory roughness still counts. A grader doesn’t care whether a chip came from the pack or from your hands.
Step 6: Inspect the surface, front and back
Start under daylight: print defects, wax or gum stains, ink or pencil marks, discoloration, fingerprints, and film. Then switch to raking light and rotate the card a full 360 degrees, hunting for scratches, scuffs, indentations, dimples, roller marks, and print lines. Don’t skip the back; back surface flaws count too. A gentle wipe with a dry microfiber cloth can lift fingerprints, but never use liquids or chemicals, and don’t press hard on chrome.
Step 7: Flag anything that could trigger a qualifier
PSA uses qualifiers for cards that otherwise meet a grade but have a specific problem: OC (off-center), ST (staining), PD (print defect), OF (out of focus), MK (marks), and MC (miscut). Qualified grades generally sell well below the same number without one. Other companies typically handle these issues by lowering the grade instead, so check how the grader you plan to use treats them.
Step 8: Run the sports-specific checks
Autographs, relics, chrome, and vintage each have their own failure points, covered below. Don’t skip this step on a hit; that’s usually where the money is.
Step 9: Score it honestly and decide
Write down the worst issue in each category and estimate the grade from the weakest area, not the average. If you catch yourself rounding up, round down. Then compare your realistic grade, not your hoped-for grade, against recent sales at that grade and the raw price. That comparison is your submit-or-skip decision.
Centering standards to check against
These are publicly documented PSA centering tolerances that most collectors measure against. Grading companies revise wording and numbers from time to time, and PSA has tightened its gem mint language before, so confirm the current standard on the official site before you submit.
| PSA grade | Front centering | Back centering |
|---|---|---|
| PSA 10 Gem Mint | About 60/40 or better (verify; current language may be tighter) | About 75/25 or better |
| PSA 9 Mint | About 65/35 or better | About 90/10 or better |
| PSA 8 NM-MT | About 70/30 or better | About 90/10 or better |
Beckett is stricter at the top: its centering subgrade for a 10 calls for essentially perfect 50/50 front centering, and a 9.5 still requires near-perfect centering. SGC separates a Pristine 10 from a Gem Mint 10, with Pristine reserved for essentially perfect cards. Check each company’s published scale for exact numbers. Practical rule: if the front is worse than about 65/35, a PSA 10 is off the table no matter how clean the rest of the card is.
Sports-specific checks most checklists skip
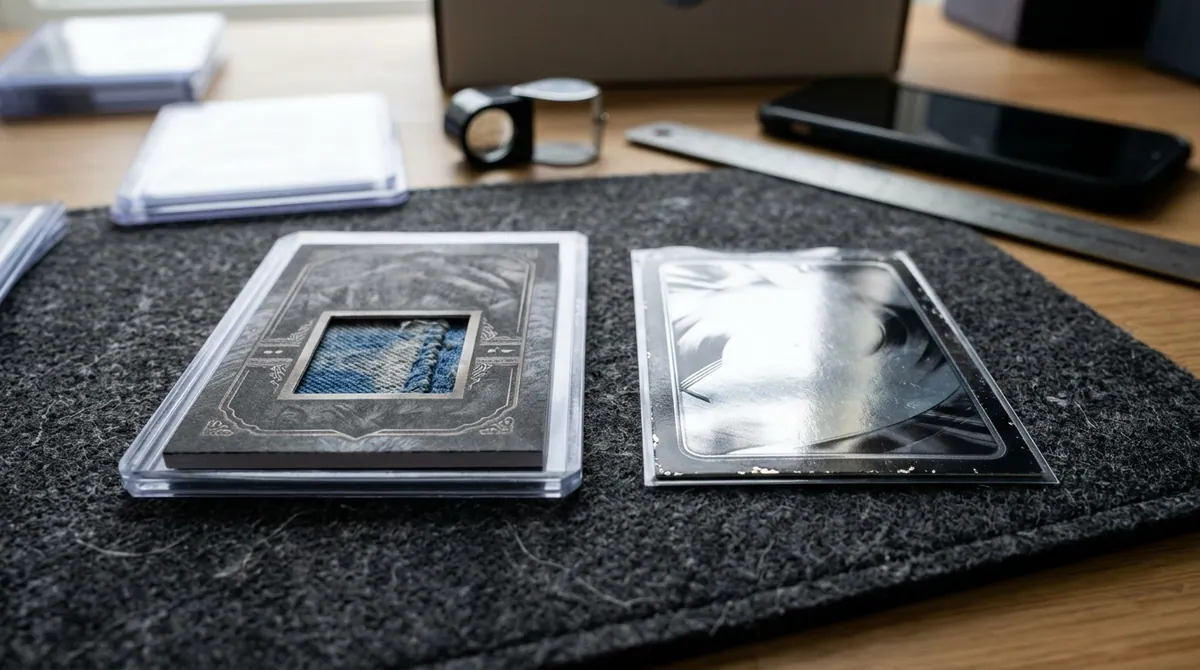
Autographs
Pack-certified autographs, issued by the manufacturer with a certification statement, are graded with the card, and some companies offer a separate autograph grade for an added fee. Signatures you got in person or through the mail need third-party autograph authentication (PSA/DNA, JSA, and Beckett Authentication are the common options), and policies and fees vary, so check before shipping. On-card autos: look for smearing, skips, fading, and ink bleed. Sticker autos: make sure the sticker sits flat and square, with no bubbles, lifting edges, or damage along the sticker border.
Relic and patch cards
Relic cards are thicker than standard stock, so measure the thickness (in points) and tell the grading company, since it affects the holder and sometimes the service level. Their extra weight means they knock around in top loaders, so check corners and edges extra carefully. Inspect the window frame for tears or lifting. On high-end patches, be skeptical of a patch that looks too perfect or doesn’t fit the player’s team or era; swapped patches exist.
Chrome and refractor stock
Chromium surfaces are unforgiving. Under raking light, look for print lines, roller marks, dimples (tiny pits), and fine scratches from pack sorting or handling. Colored borders chip easily, so spend extra time on edges. A card being fresh from a pack is no guarantee of anything; plenty come out off-center or with factory chipping.
Vintage
Check for wax and gum stains, pencil checkmarks on checklist cards, rubber-band dents along edges, tape residue, and paper loss on the back from album removal. Also look for print snow and fish eyes. Adjust your target: for many vintage cards the realistic goal is a solid mid-grade, and a well-centered 5 or 6 of a key card can be worth far more than a modern 10.
When grading is not worth the fee
The math is simple: realistic graded sale price minus raw sale price has to beat the grading fee, shipping both ways, insurance, and any selling fees, with a meaningful margin left over. Fees are usually tied to declared value and turnaround, and they change, so check current pricing on the grader’s site.
Skip grading when:
- The card is modern base or a common parallel where 10s sell near or below the cost of grading.
- Your checklist puts it at 8 or lower, unless the card holds real value at that grade (vintage stars, key rookies).
- You suspect trimming, recoloring, or other alteration. You’ll pay a fee to get the card back without a number.
- It’s a personal-collection card you’ll never sell and it’s safe in a sleeve and top loader. The exception: high-value cards where authentication protects you, or vintage issues that are commonly counterfeited.
- You’re tempted to crack and resubmit a card hoping for a bump. Only do it when the price gap between grades clearly covers another round of fees.
How Card Grading AI fits into the checklist
Card Grading AI handles the photo-based parts of this checklist. You photograph the front and back, and it measures centering and flags likely corner, edge, and surface issues, then returns an estimated pre-grade. It’s most useful for triage: run a stack of cards through it, then put the loupe and penlight on the ones that look like real contenders. You can see what it checks on our features page and how the analysis works in our AI card grading overview.
To be clear about limits: the result is an estimate, not an official grade, and it’s no substitute for PSA, BGS, SGC, CGC, or TAG. Photos can’t measure card thickness, can’t reliably detect every trim, and can’t authenticate a signature, which is why Steps 1, 2, and 8 still need your hands and eyes. Use the AI for a fast, consistent first pass and the physical checklist for the final call.
If you’ve got a pile of sports cards and no idea which ones deserve a submission, start with our sports card grading page, scan your best candidates in Card Grading AI, and run this checklist on the cards that make the cut. You’ll spend fees only on cards with a real shot.
FAQ
What is the most important item on a sports card grading checklist?
Centering and corners eliminate the most cards from 10 contention, so check them first. Centering is the fastest to measure, and one soft or dinged corner can cap a card at an 8 or 9 no matter how clean the surface is.
What centering do I need for a PSA 10?
PSA's published standard has historically been about 60/40 or better on the front and about 75/25 or better on the back. PSA has revised its gem mint centering language over time, so confirm the current numbers on the official PSA site before submitting.
Can I grade sports cards myself?
You can pre-grade them by following a checklist or using a tool like Card Grading AI, which gives an estimated grade from photos. Only a grading company such as PSA, BGS, SGC, CGC, or TAG can issue an official grade and holder.
Should I clean a sports card before grading?
Only gently. A light wipe with a clean, dry microfiber cloth can remove fingerprints or dust. Never use liquids, chemicals, or erasers, and avoid pressing on chrome surfaces. Anything that alters the card can get it rejected as altered.
Is it worth grading modern base rookie cards?
Usually only if the realistic graded sale price clearly beats the raw price plus fees, shipping both ways, insurance, and selling fees. For many modern base cards, even a 10 sells close to the cost of grading, so keeping them raw is often the smarter move.
Keep reading
Related guides
Ready to inspect your next card?
Scan your cards instantly with Card Grading AI
Capture a clear front-and-back photo, review an AI-assisted condition estimate, and keep standout cards organized in your collection.