Collector guide
How to Photograph Cards for Grading: A Practical Guide
Learn how to photograph cards for grading with the right light, angles, and settings so surface flaws, edges, and centering show up clearly.
By Matteo G.
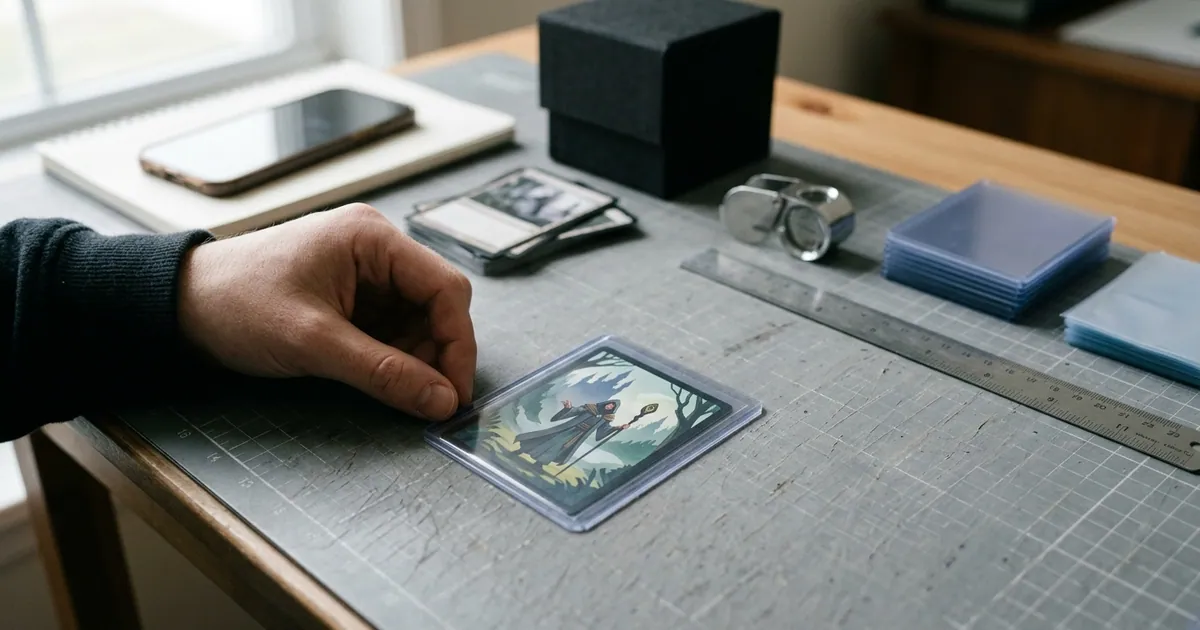
Every pre-grade you’ll ever get — from your own eyes, from a friend, or from an AI tool — is only as good as the image behind it. A blurry, glare-washed phone snap can hide a print line that costs you two full grade points, or invent a “scratch” that’s really just a reflection off your ceiling light. If you’re deciding whether to spend $20 to $150 per card on submission fees, the ten minutes you spend learning to shoot properly is the highest-leverage prep work you can do.
This guide covers the practical setup: surface, light, angles, camera settings, and the specific shot list that actually surfaces the four things graders care about — centering, corners, edges, and surface.
Why Photo Quality Changes Your Grade Estimate
Grading companies evaluate cards in hand, under controlled light, often with magnification. You can’t fully replicate that, but you can get remarkably close — and the gap between a careless photo and a careful one is enormous.
Three failure modes cause most bad pre-grades:
- Glare blowout. A direct overhead light bounces off a holo or glossy stock and turns half the card into a white blob. Any flaw under that blob is invisible.
- Perspective distortion. Shooting from an angle makes one border look wider than the other. That single mistake ruins centering estimates, which is often the difference between a 9 and a 10.
- Soft focus. Phone cameras hunt for focus on shiny surfaces. A slightly soft image erases the fine print lines and micro-scratches that separate a Gem Mint from a Near Mint.
Fix those three and you’ve solved 80% of the problem. If you want the background on what these images feed into, our how AI card grading works breakdown explains what the analysis is actually looking for.
Your Setup: What You Need
You do not need a studio. You need control.
Surface. Use a flat, matte, neutral background — medium gray or plain black works best. Avoid white (it fools auto-exposure into underexposing the card), avoid wood grain, avoid your bedspread. A sheet of gray cardstock from a craft store costs a few dollars and will outperform most improvised setups.
Light. Two soft sources at roughly 45 degrees on either side of the card. Options in order of cost: a north-facing window with a sheer curtain (free and excellent), two clip-on LED lamps bounced off white paper, or a pair of small LED panels with diffusers. Turn off overhead room lights so you aren’t mixing color temperatures.
Camera support. Any tripod, phone clamp, or even a stack of books. Handheld shooting introduces tilt, and tilt destroys centering accuracy. If you must go handheld, brace your elbows on the table.
Cleaning. Wipe your lens. A fingerprint smear on the phone camera adds a soft haze that reads as surface wear. Use a microfiber cloth on the lens only — never on the card itself.
Camera Settings That Matter
On a phone, the defaults are mostly fine, but four adjustments make a real difference:
- Turn off the flash, always. On-camera flash produces a hotspot dead center on the card. There is no scenario where it helps.
- Lock focus and exposure. Tap and hold on the card until AE/AF Lock appears. This stops the camera from re-metering between shots.
- Use the 1x main lens, not the ultra-wide. Ultra-wide lenses barrel-distort edges, which bends straight borders and wrecks centering reads.
- Shoot at a slight distance and crop, rather than pushing the lens close. Getting within a couple inches introduces distortion and often forces the camera into macro mode with a narrow depth of field. Back off to 8-12 inches and let resolution do the work.
If your phone offers a Pro or Expert mode, shoot in the highest resolution available and avoid heavy HDR, which can smooth over exactly the subtle surface texture you’re trying to capture.
The Shot List: Six to Eight Frames Per Card
Here’s the sequence that covers all four grading subgrades.
1-2. Flat front and back. Camera directly overhead, perfectly parallel to the card, even light from both sides. The card should fill most of the frame with a small margin of background on all sides — you need that background visible for border measurement. This is your centering shot and your baseline condition shot.
3-4. Raking light, front and back. Kill one light. Move the other to a low, near-horizontal angle so it skims across the surface. Now shoot again. This is the single most underrated technique in card photography: raking light throws shadows from print lines, dimples, indentations, and creases that flat light renders invisible. Slowly rotate the card and take a few frames — flaws pop at specific angles.
5-8. Corner close-ups. Move in for detail on each corner. Corners are where whitening, fraying, and soft points live, and they’re a common reason a card comes back a 8 or 9 instead of a 10. Two shots covering diagonal pairs works if you’re moving fast; four individual shots is better.
Optional: edge pass. Tilt the card so you’re looking along one edge at a shallow angle. This reveals chipping and whitening along the border that a flat overhead shot compresses to nothing.
Getting Centering Photos Right
Centering deserves special attention because it’s measured, not judged — meaning small photographic errors turn into concrete numerical errors.
| Mistake | What It Does | Fix |
|---|---|---|
| Camera tilted off-axis | One border reads wider than reality | Shoot straight down; use a tripod or grid overlay |
| Ultra-wide lens | Curves straight borders | Switch to the 1x main lens |
| Card not flat | Warped or lifted corners skew borders | Weight the card gently or shoot on a rigid flat surface |
| Background too similar to border | Border edge is hard to detect | Use contrasting gray or black backdrop |
| Cropped too tight | No reference for the outer edge | Leave visible margin around all four sides |
Most phones have a grid overlay option in the camera settings — turn it on and align the card’s edges with the gridlines. If your phone has a level indicator in the camera app, use it. For a deeper dive into how centering percentages are calculated and what thresholds different companies apply, see our guide to card centering.
Handling the Card Safely While You Shoot
Good photos aren’t worth a new scratch. A few rules:
- Handle by the edges only, ideally with clean, dry hands or nitrile gloves.
- Shoot over a soft mat, not a hard table, so a drop doesn’t crease a corner.
- Remove the card from its sleeve for the shoot, then re-sleeve immediately. Don’t leave raw cards sitting out.
- Never use compressed air, cleaning fluid, or an eraser on a card surface. Grading companies detect alteration attempts, and it can void the submission entirely.
If a card is already valuable and you’re nervous about removing it from a sleeve, shoot through a brand-new, perfectly clear penny sleeve and mentally discount any “surface” flaws you see.
Turning Photos Into an Actual Pre-Grade
Once you have a clean set of images, you can evaluate them yourself against the subgrade criteria — or run them through analysis to get a structured estimate. Card Grading AI takes your front and back photos and returns condition estimates across centering, corners, edges, and surface, plus a projected grade range you can weigh against submission costs.
A few things worth being clear about: these are estimates and pre-grades, not official grades. Card Grading AI is not affiliated with PSA, BGS, CGC, or TAG, and no software can guarantee what a human grader will assign in hand. What it can do is help you triage — separating the cards clearly worth submitting from the ones that will come back a 7 and cost you more in fees than the slab adds in value.
To see the workflow end to end, walk through how it works, or browse the full feature set including bulk scanning, collection tracking, and value estimates.
A Quick Pre-Shoot Checklist
- Lens wiped clean
- Flash off, HDR moderate, 1x lens selected
- Neutral matte background, contrasting with the card border
- Two soft lights at 45 degrees, overhead room lights off
- Camera parallel to card, grid overlay on
- Focus and exposure locked
- Card bare, handled by edges, over a soft surface
- Full shot list: flat front, flat back, raking front, raking back, corners
Run that checklist a few times and it becomes muscle memory. The payoff is real: consistent, honest images mean your pre-grades track much closer to what comes back in the slab, and you stop paying grading fees on cards that were never going to make the cut. Ready to test your photos? Upload a set and see what Card Grading AI reports back.
FAQ
Should I photograph cards inside a penny sleeve or toploader?
Take your primary photos with the card bare, held by the edges over a soft surface. Sleeves add glare, scratches, and haze that hide real surface flaws or fake ones that aren't there. If you're uncomfortable removing the card, at least shoot through a clean, unscratched sleeve and note that in your records — but expect less reliable surface reads.
Is a phone camera good enough, or do I need a scanner?
A modern phone camera is genuinely good enough for pre-grading photos, and in one way it's better: you can angle the card to catch surface reflections that a flatbed scanner flattens out. Scanners excel at centering measurements because they eliminate perspective distortion. Many collectors use both — phone shots for surface and edges, a scan for centering.
What lighting is best for photographing cards for grading?
Soft, indirect, even light from two sides works best for overall condition shots — think a window with sheer curtains or two diffused LED panels. Then add a second pass with a single hard light raking across the surface at a low angle, which is what reveals print lines, dimples, scratches, and creases that flat light hides completely.
How many photos should I take per card?
For a serious pre-grade, plan on six to eight: front flat, back flat, front raking light, back raking light, and one close-up of each of the four corners (or two shots covering two corners each). Add extra frames for any specific flaw you want documented for insurance or resale.
Do good photos guarantee a better grade from PSA or BGS?
No. Photos don't change the card — they change what you can see before you spend money on submission. Better images help you and tools like Card Grading AI produce more accurate estimates, so you submit the right cards and skip the ones that won't clear your target. Final grades always come from the grading company's own in-hand review.
Keep reading
Related guides
Ready to inspect your next card?
Scan your cards instantly with Card Grading AI
Capture a clear front-and-back photo, review an AI-assisted condition estimate, and keep standout cards organized in your collection.