Collector guide
How to Measure Card Centering: A Step-by-Step Guide
Learn how to measure card centering like a grader: border math, 55/45 tolerances, scanning tips, and how AI pre-grading estimates centering fast.
By Matteo G.
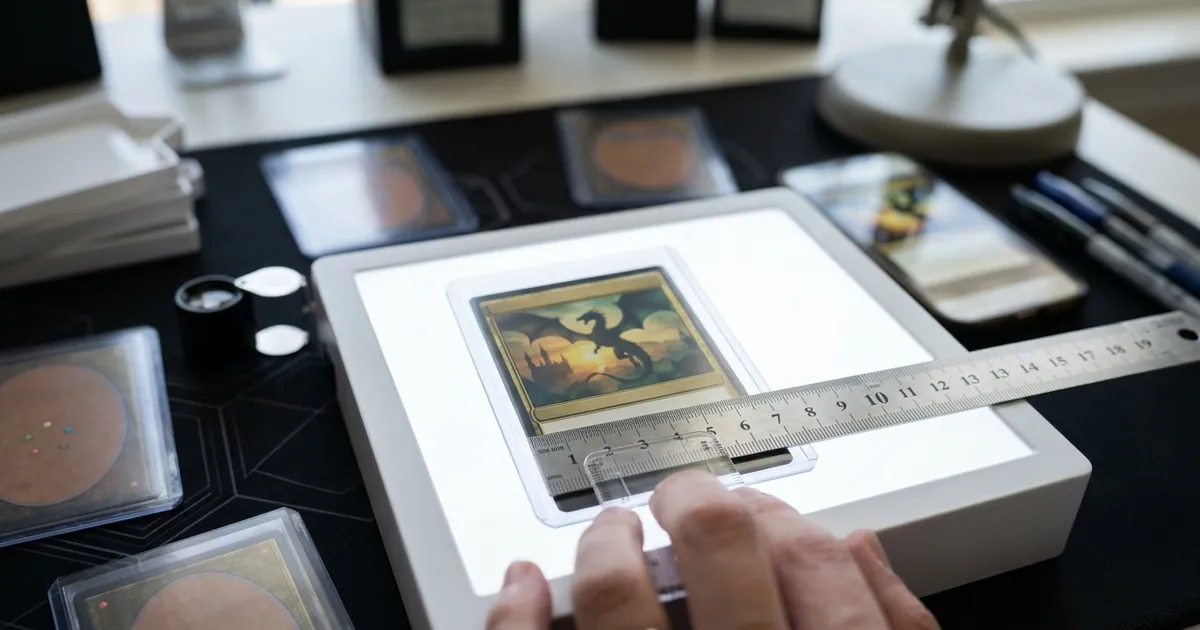
Centering is the one condition factor you can measure objectively at home. Corners, edges, and surface all involve judgment calls, but centering comes down to arithmetic: how much border sits on one side of a card versus the other. That makes it the single best filter for deciding which cards are worth a grading fee and which should stay raw in your binder.
The problem is that most collectors eyeball it. A card that “looks fine” on the kitchen table can come back a 9 instead of a 10 because the left border was 0.4 mm wider than the right. Below is the exact process graders use, how to reproduce it with tools you already own, and where an AI pre-grade can save you time on a large collection.
What Centering Actually Measures
Centering describes how evenly the printed image sits inside the cut card. During manufacturing, sheets are printed and then cut, and neither step is perfect. If the cutting blade drifts, the image shifts toward one side.
Graders express centering as a ratio of two opposing borders, always adding up to 100. A card described as 60/40 has one border that is 50% wider than the other. Perfect is 50/50. You calculate two ratios per side of the card:
- Left/right centering — horizontal shift
- Top/bottom centering — vertical shift
The worse of the two ratios is generally what limits the grade. A card that is 50/50 vertically but 70/30 horizontally is a 70/30 card in practice.
The Centering Formula
The math is simple:
Smaller border ÷ (left border + right border) × 100 = the smaller number in your ratio
Example: your left border measures 1.8 mm and your right border measures 2.2 mm.
- Add them: 1.8 + 2.2 = 4.0 mm
- Divide the smaller by the total: 1.8 ÷ 4.0 = 0.45
- Multiply by 100: 45
- Result: 55/45 centering
Do the same for top and bottom. Then repeat both measurements on the back of the card.
One critical rule: measure to the same reference point every time. Pick the outer edge of the printed frame — not the edge of the artwork, not a holo line — and stay consistent. Switching reference points mid-measurement is the most common source of bad numbers.
Tools That Actually Work
You do not need lab equipment, but you do need something better than a school ruler.
Digital calipers. A cheap pair reading to 0.01 mm is the most accurate physical tool. Measure with the card in a penny sleeve or, ideally, out of the sleeve on a flat surface. Do not clamp hard — you can dent an edge.
A flatbed scanner at 600 DPI or higher. This is the method most serious collectors settle on. At 600 DPI, one millimeter is roughly 24 pixels, so you can measure borders in any image editor with a pixel ruler and get precision far beyond the naked eye. Scanners also eliminate perspective distortion, which is the fatal flaw of phone photos.
A centering tool or overlay grid. Transparent plastic centering guides printed with ratio lines are inexpensive and fast for triaging a stack. They are less precise than calipers but great for sorting keepers from rejects.
Your phone plus an app. Convenient and fast, and good enough for triage if you shoot straight down with even light. This is where AI-assisted pre-grading fits: it handles edge detection and the math for you across dozens of cards in the time it takes to caliper three.
Step-by-Step: Measuring a Single Card
- Clean your workspace and the card surface. Dust on a scanner bed reads as an edge.
- Remove the card from any toploader. Thick plastic refracts light and blurs border edges. A penny sleeve is acceptable; rigid holders are not.
- Scan or photograph the front, square to the card. If using a phone, keep the lens parallel to the card and centered over it.
- Measure the left border at three points — near the top, middle, and bottom. Average them. If the three numbers differ by a lot, the card may be miscut or the frame may be printed crooked, which is a separate defect.
- Repeat for the right, top, and bottom borders.
- Run the formula for horizontal and vertical.
- Flip and repeat for the back.
- Record the worst ratio from all four measurements. That number drives your submission decision.
Common Centering Tolerances by Grade
These are the widely published guidelines from the major grading companies. Standards vary by set and can be revised, and graders apply judgment on top of the numbers, so use this as orientation rather than gospel.
| Grade | Front centering (approx.) | Back centering (approx.) |
|---|---|---|
| BGS 10 Pristine | 50/50 | 55/45 or better |
| PSA 10 / CGC 10 Gem Mint | 55/45 to 60/40 | 75/25 |
| BGS 9.5 Gem Mint | 55/45 | 60/40 |
| PSA 9 Mint | 60/40 | 90/10 |
| PSA 8 NM-MT | 65/35 | 90/10 |
| PSA 7 Near Mint | 70/30 | 90/10 |
The practical takeaway: front centering worse than 60/40 effectively removes a PSA 10 from the table, no matter how clean the corners are. If you want the full breakdown of tolerances, ratios, and edge cases, our card centering reference goes deeper.
Tricky Cases: Full-Art, Borderless, and Modern Chrome
Not every card has a friendly white border.
Full-art and borderless cards. There is no border to measure, so use a consistent internal element: the edge of a holo pattern, an inner frame line, the top of a text box, or the copyright line at the bottom. Measure from that element to each card edge. Your numbers will be less standardized than a bordered card, but they are still useful relative comparisons.
Chrome and refractor stock. Reflections wash out border definition under direct light. Scan these instead of photographing, or shoot at an angle to your light source with the phone still square to the card.
Dark or black borders. The card edge and the border blend together. Place the card on a bright white background so the outer edge contrasts. A light box works well.
Miscuts and diamond cuts. If the border width changes dramatically from top to bottom on the same side, you are looking at a diagonal cut rather than a simple shift. These almost never grade high, but severe miscuts occasionally carry error-card value on their own.
Using AI to Screen a Whole Collection
Measuring one card carefully takes a few minutes. Measuring four hundred takes a weekend you will not get back.
This is the practical use case for Card Grading AI. Photograph the front and back, and the app detects card edges and border lines, estimates left/right and top/bottom ratios, and folds centering into an overall condition estimate alongside corners, edges, and surface. You get a ranked list of which cards clear common Gem Mint centering thresholds and which do not.
A few things to be clear about. These are estimates and pre-grades, not official grades, appraisals, or guarantees. No app can promise what PSA, BGS, CGC, or TAG will assign — final grades involve human review, set-specific standards, and factors a camera cannot see. What a pre-grade does well is triage: it tells you which twelve cards out of four hundred deserve your calipers and your submission dollars.
See how the scanning and analysis flow works, or browse the full feature set including collection tracking and bulk scanning.
A Simple Workflow That Saves Money
- Bulk scan your candidates with the app to get rough centering estimates.
- Shortlist anything the pre-grade puts near or better than 60/40 on the front.
- Verify the shortlist manually with calipers or a 600 DPI scan — this is where precision pays.
- Check the back on every survivor. Backs eliminate more submissions than people expect.
- Submit only the cards that clear your target grade’s tolerance with margin, factoring in corners, edges, and surface.
Grading fees plus shipping and insurance add up fast. Centering is the cheapest, most objective filter you have — and the only condition factor where a ruler beats an opinion.
Ready to screen your stack? Start scanning with Card Grading AI and let the math do the sorting.
FAQ
What centering do I need for a PSA 10?
PSA's published standards for Gem Mint generally allow up to about 55/45 to 60/40 centering on the front and 75/25 on the back, depending on the card and set. Tighter is always safer. Because standards can change and graders apply judgment, treat any number you calculate at home as a planning tool, not a guarantee. Always check the grading company's current published criteria before submitting.
How do you calculate a centering percentage?
Measure the left border and the right border in the same unit (millimeters work well). Divide the smaller border by the sum of both borders, then multiply by 100. For example, a 1.8 mm left border and a 2.2 mm right border gives 1.8 / 4.0 = 45%, so the card is 55/45 horizontally. Repeat for top and bottom to get vertical centering.
Does the back of a card count toward centering?
Yes. Most grading companies evaluate both sides, though back tolerances are looser than front tolerances. A card with perfect front centering can still be capped a grade lower if the back is badly shifted, so measure both sides before you decide to submit.
How do you measure centering on full-art or borderless cards?
Use a repeating internal design element instead of a white border, such as a holo pattern edge, a frame line, a text box, or the copyright line. Measure the distance from that element to each card edge. Graders do something similar, but full-art cards are inherently harder to judge, so expect more variance between your estimate and the final grade.
Can an app measure centering accurately from a phone photo?
It can get close if the photo is square to the card, evenly lit, and high resolution. Angle is the biggest enemy: shooting from even a slight tilt stretches one border and shrinks the other. Card Grading AI detects card edges and border lines to estimate centering ratios, but the output is an estimate to guide your decisions, not an official grade.
Keep reading
Related guides
Ready to inspect your next card?
Scan your cards instantly with Card Grading AI
Capture a clear front-and-back photo, review an AI-assisted condition estimate, and keep standout cards organized in your collection.