Collector guide
How AI Card Grading Works: Inside the Scan-to-Score Process
A clear, practical look at how AI card grading works: image capture, edge detection, centering math, surface analysis, and how to read your pre-grade estimate.
By Matteo G.
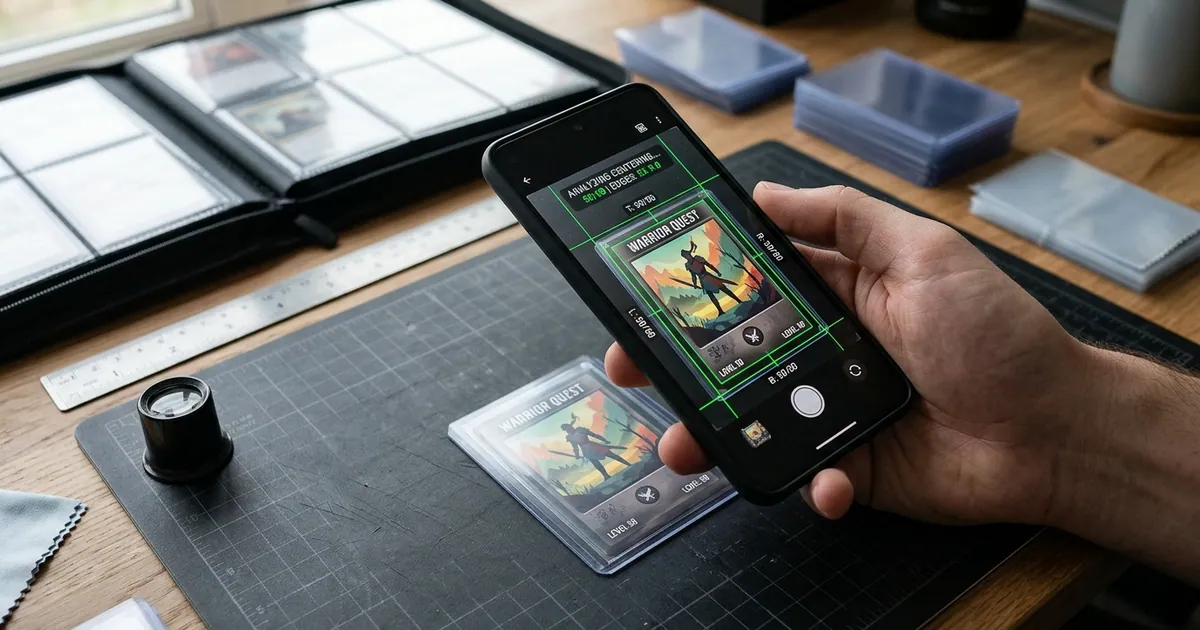
If you have ever wondered what happens between tapping the shutter button and seeing an estimated grade on your screen, this is the walkthrough. AI card grading is not magic and it is not guesswork either. It is a chain of measurable steps: capture a clean image, find the card in the frame, locate its borders and print area, measure geometry in pixels, inspect corners and edges at high magnification, look for surface anomalies, then translate all of that into a score range that mirrors how professional graders think. Understanding each step is the fastest way to get results you can actually trust and to know exactly where the limits are.
The Short Version: Measurement, Not Opinion
A human grader looks at a card holistically, then assigns a number based on years of calibrated experience. AI works from the opposite direction. It measures thousands of specific things about your card’s pixels, compares those measurements against expected values, and produces a probable grade range.
That difference matters. AI is unusually good at objective geometry, like whether your left border is 55% of the total border width. It is weaker at nuance, like whether a faint print line counts as a defect on that specific set. The best workflow uses AI for the measurable stuff and your own eyes for the judgment calls. Our AI card grading overview breaks down which categories lean which way.
Step 1: Image Capture and Normalization
Everything downstream depends on this step. The system first needs a usable photograph, so it looks for a few conditions:
- The full card in frame, with visible background on all four sides so borders can be measured.
- Even lighting with no hotspot reflecting off the holo or gloss.
- Sharp focus across the whole card, not just the center.
- A perpendicular angle, because a tilted camera introduces perspective distortion that skews every measurement.
Once a photo passes, normalization begins. The image is deskewed and flattened so the card becomes a clean rectangle. Contrast and white balance are adjusted so a card shot under a warm kitchen light and one shot near a window can be compared on similar terms. This is also why shooting through a sleeve or a scratched toploader is a bad idea: the algorithm cannot tell your protective plastic’s scuff from your card’s scuff, and it will often assume the worst. See our how it works page for the exact capture setup we recommend.
Step 2: Card Detection and Border Segmentation
Next the system separates card from background, then separates border from print area. This is segmentation, and it is where a lot of accuracy is won or lost.
Edge detection finds the physical outline of the card. A second pass finds the inner boundary where the colored or white border meets the artwork or frame. On modern cards with high contrast borders, this is straightforward. On cards with dark art bleeding into a dark border, or on vintage cards with soft, uneven cuts, the boundary is genuinely ambiguous and small interpretation differences produce different centering numbers.
This is why a dark, plain, non-reflective background helps so much. It gives the algorithm an unmistakable outer edge to lock onto.
Step 3: Centering Math
Once both boundaries are mapped, centering becomes arithmetic. The system measures the border width on all four sides in pixels and converts it to a ratio.
If the left border is 42 pixels and the right is 58, that is roughly 42/58 horizontal centering. Grading companies publish tolerance guidelines, and the estimate compares your measurements against those thresholds. Front centering carries much more weight than back centering at most companies, which is why a card can have a sloppy back and still grade well.
Centering is the single most objective category and the one where AI has the clearest advantage over eyeballing it. Human eyes are surprisingly poor at judging a 55/45 split, especially on cards with asymmetrical artwork that creates optical illusions. If you want to go deeper on tolerances by grade tier, read our card centering guide.
Step 4: Corner and Edge Inspection
With the card mapped, the system zooms into the four corners and the four edges as separate crops, then analyzes each at high magnification.
For corners it looks for deviation from a sharp point: rounding, whitening where colored ink has worn away to expose the white core, fraying, and dings that break the outline. For edges it looks for chipping, nicks, and whitening along the perimeter, plus roughness that suggests a poor factory cut.
Each corner and edge gets scored individually, then combined. This mirrors the real grading process, where one soft corner can cap an otherwise flawless card. Worth knowing: whitening on a black-bordered card is dramatically more visible to both AI and humans than the same wear on a white-bordered card, which is why black-bordered sets are notoriously hard to grade high.
Step 5: Surface Analysis
Surface is the hardest category for any camera-based system, and honest tools admit it. The analysis looks for scratches, print lines, indentations, dimples, roller marks, gloss inconsistency, and staining.
The core difficulty is that many surface defects are only visible at a specific angle relative to a light source. A hairline scratch on a holo can vanish completely in a straight-on photo and jump out when tilted 20 degrees. That is why capturing an extra angled shot of the front improves surface accuracy more than any other single change you can make.
AI can also confuse print texture with damage. Some sets have intentional textured foil or canvas-like stock, and a system that has not accounted for that pattern may flag normal manufacturing texture as scratching. Always sanity-check surface flags with your own eyes under a bright light.
Step 6: Combining Subgrades Into an Estimate
The final step converts four category scores into an overall estimate. Grading companies do not simply average subgrades. The lowest category tends to dominate, and specific combinations have known ceilings.
| Category | What AI measures well | Where AI struggles |
|---|---|---|
| Centering | Border ratios in precise percentages | Ambiguous inner borders on dark or vintage cards |
| Corners | Rounding, whitening, outline breaks | Very slight softness at low resolution |
| Edges | Chipping, nicks, cut roughness | Distinguishing factory cut from handling wear |
| Surface | Visible scratches, print lines, staining | Angle-dependent hairlines, textured stock |
A good tool returns a range rather than a single number, because that honestly reflects uncertainty. “Likely 8 to 9, with corners as the limiting factor” is far more actionable than a bare “8.5.” The range tells you whether the card is a confident submit, a borderline call, or a clear pass. You can see how this output is structured across card types in our features overview.
What AI Card Grading Cannot Do
Being clear about limits is what makes the tool useful:
- It does not issue official grades. Every result from Card Grading AI is an estimate to support your own decisions. Only PSA, BGS, CGC, TAG and similar companies assign real grades.
- It does not authenticate. Counterfeit detection and alteration analysis require tools and expertise beyond a phone camera.
- It does not appraise. An estimated grade is not a value guarantee, and market prices move independently.
- It cannot see what your photo did not capture. Garbage in, garbage out applies absolutely.
Practical Workflow for US Collectors
Here is how to actually use this in a submission decision:
- Pre-screen in bulk. Scan every candidate quickly to sort obvious passes from obvious keeps. Most collectors find a meaningful share of “looks mint” cards fail on centering alone.
- Re-shoot the borderline cards carefully. Better lighting, angled surface shot, close-ups of suspect corners.
- Compare the estimate against submission economics. Factor grading fees, shipping both ways, insurance, and turnaround. A card estimated at 8 to 9 in a set where a 10 carries most of the premium may not clear the math.
- Choose your company based on the limiting category. If your card’s weak point is centering, that matters differently at companies with different tolerance and subgrade practices.
- Log the estimate. Keeping your pre-grades makes it easy to check your own calibration once official grades come back, which is the fastest way to improve your eye.
Ready to Try It on Your Own Cards
The technology is only as good as your understanding of it. Now that you know the chain from capture to estimate, you can shoot better photos, interpret results with appropriate skepticism, and spend grading money on the cards most likely to return it.
Scan a few cards with Card Grading AI on web, iOS, or Android, start with the how it works walkthrough for proper capture technique, then check your centering numbers against the tolerances in our centering guide. Sort your keeps from your submits before you pay a single grading fee.
FAQ
Is an AI card grade the same as a PSA, BGS, or CGC grade?
No. An AI result is a pre-grade estimate based on the photos you provide. Only PSA, BGS, CGC, TAG, and other grading companies issue official grades, and their human graders may see things a phone camera cannot. Use AI to decide what to submit, not to replace submission.
What actually makes AI grading estimates inaccurate?
Bad input, almost always. Glare hiding scratches, blurry focus, a tilted camera angle that skews centering measurements, shooting through a sleeve or toploader, or cropping off part of the border. Flat lighting, a dark background, and a fully in-frame card fix most problems.
Can AI detect a trimmed or altered card?
Not reliably. AI can flag unusual dimensions or suspicious edge profiles if measurements fall outside expected ranges, but authentication and alteration detection require specialized equipment and expert review. Treat any AI flag as a prompt to look closer, not as a verdict.
Does AI grading work for sports cards as well as Pokemon?
Yes. The underlying analysis of centering, corners, edges, and surface applies to any rectangular card. Set-specific quirks matter, though, so vintage sports cards with rough cuts and heavy print texture usually need more human interpretation than modern glossy cards.
How many photos should I take per card?
At minimum a straight-on front and back. Adding an angled front shot to reveal surface scratches and gloss breaks, plus a close-up of any suspect corner, gives the analysis far more to work with and makes your estimate more useful.
Keep reading
Related guides
Ready to inspect your next card?
Scan your cards instantly with Card Grading AI
Capture a clear front-and-back photo, review an AI-assisted condition estimate, and keep standout cards organized in your collection.